
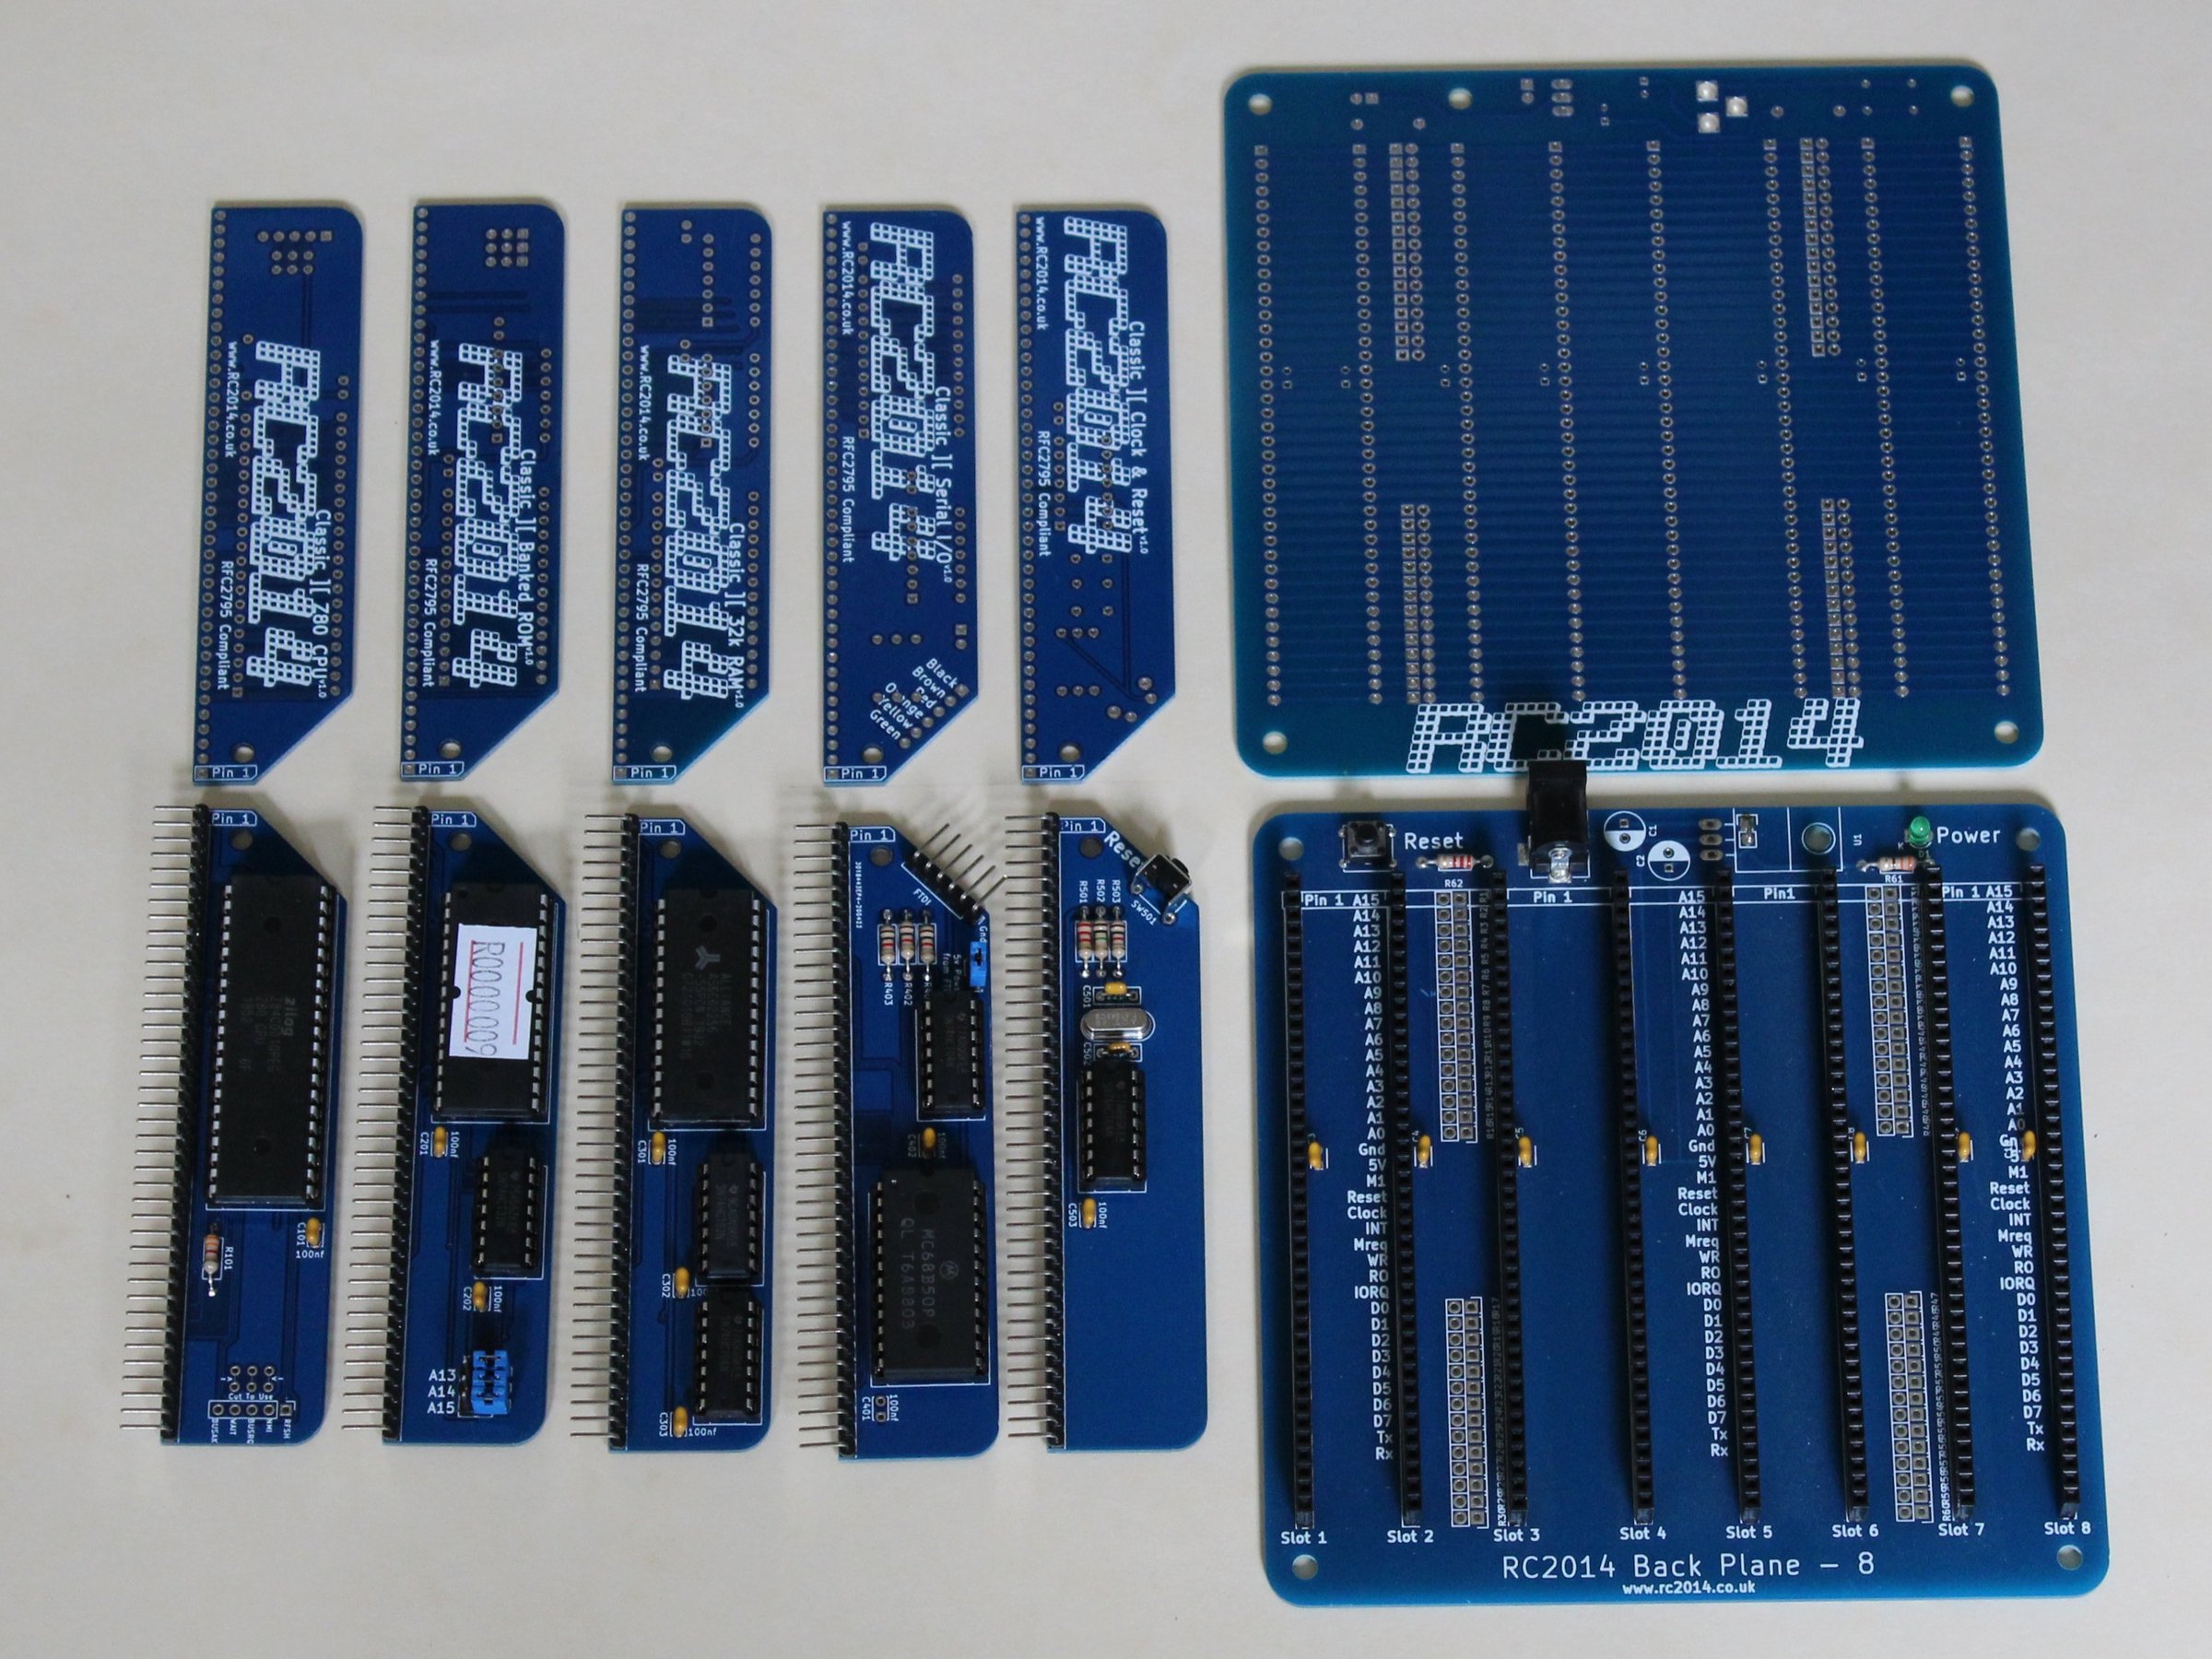
Description
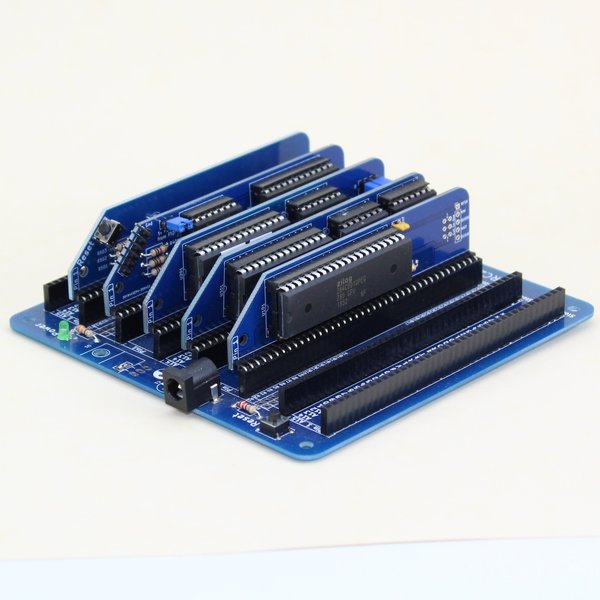
The RC2014 Classic II Z80 Computer Kit is the evolution of the original RC2014 Classic. It is a modular Z80 based retro computer kit which evokes the spirit of home computers in the late 70s and computer revolution of the early 80s. It is not a clone of anything specific, but there are suggestions of the ZX81, UK101, S100, Superboard II and Apple I in there.
Specification
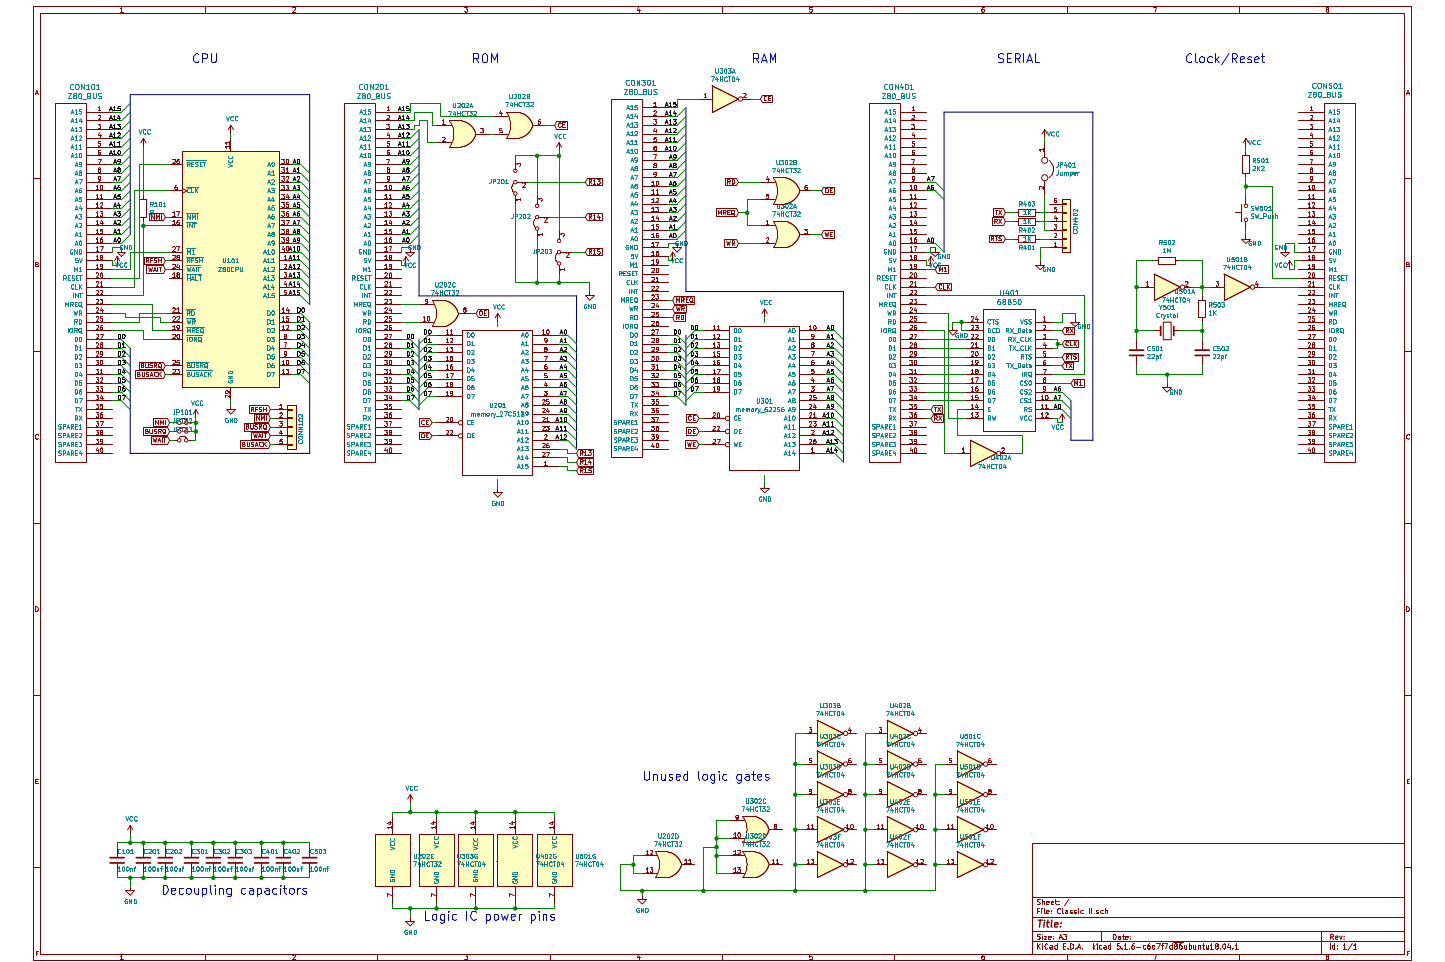
- Z80 CPU
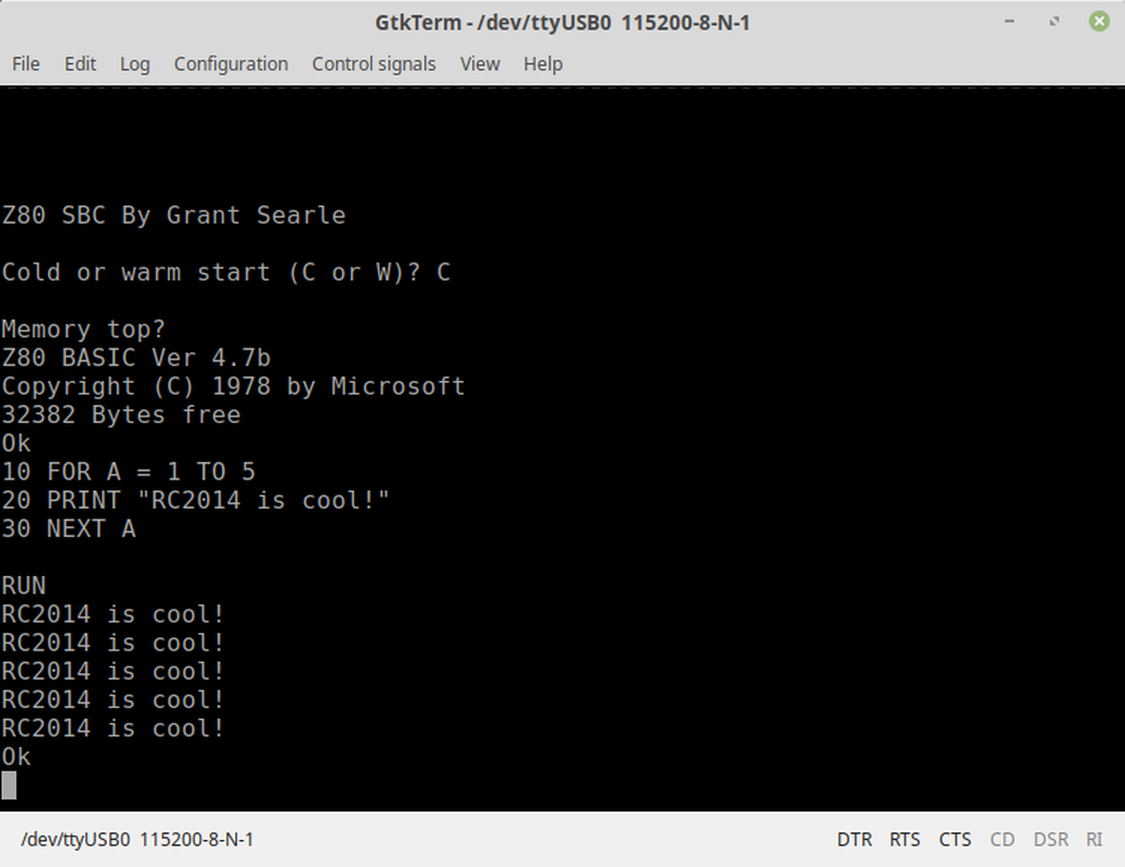
- 8k ROM with Microsoft BASIC and SCM Monitor ROM
- 32k RAM
- 7.3728 Mhz
- 6 pin FTDI compatible header
- Connect over TTL serial at 115,200bps
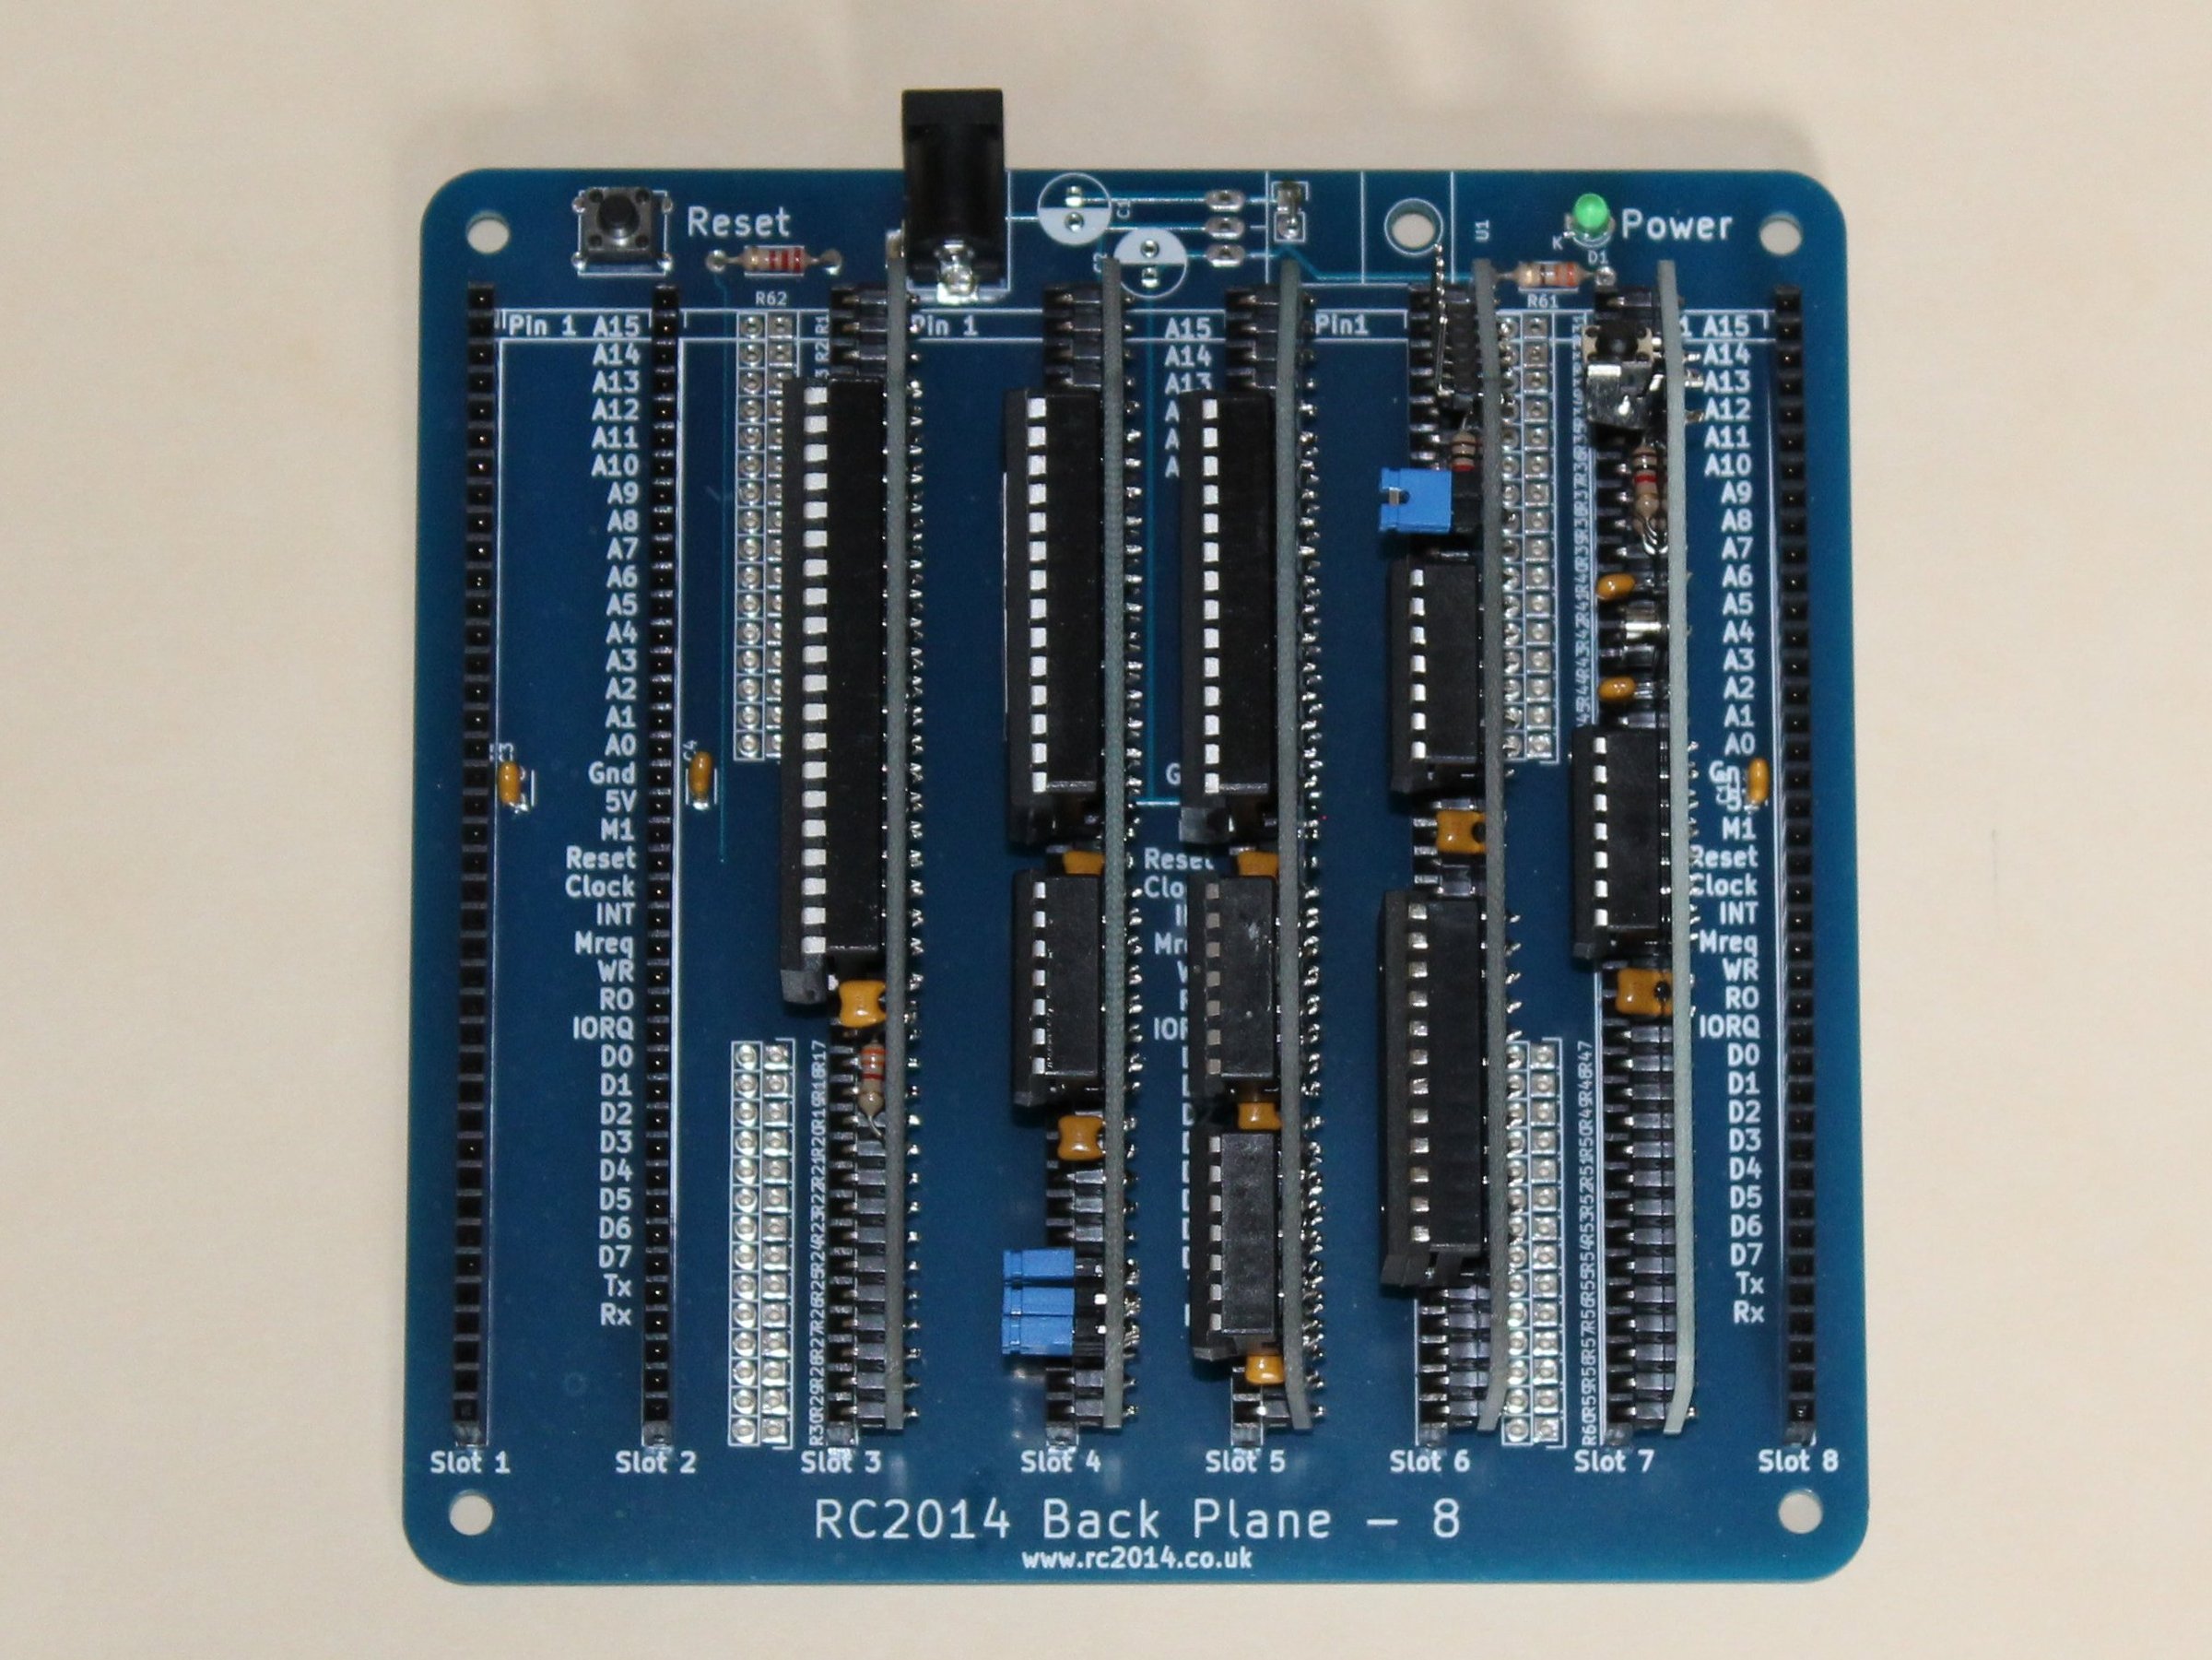
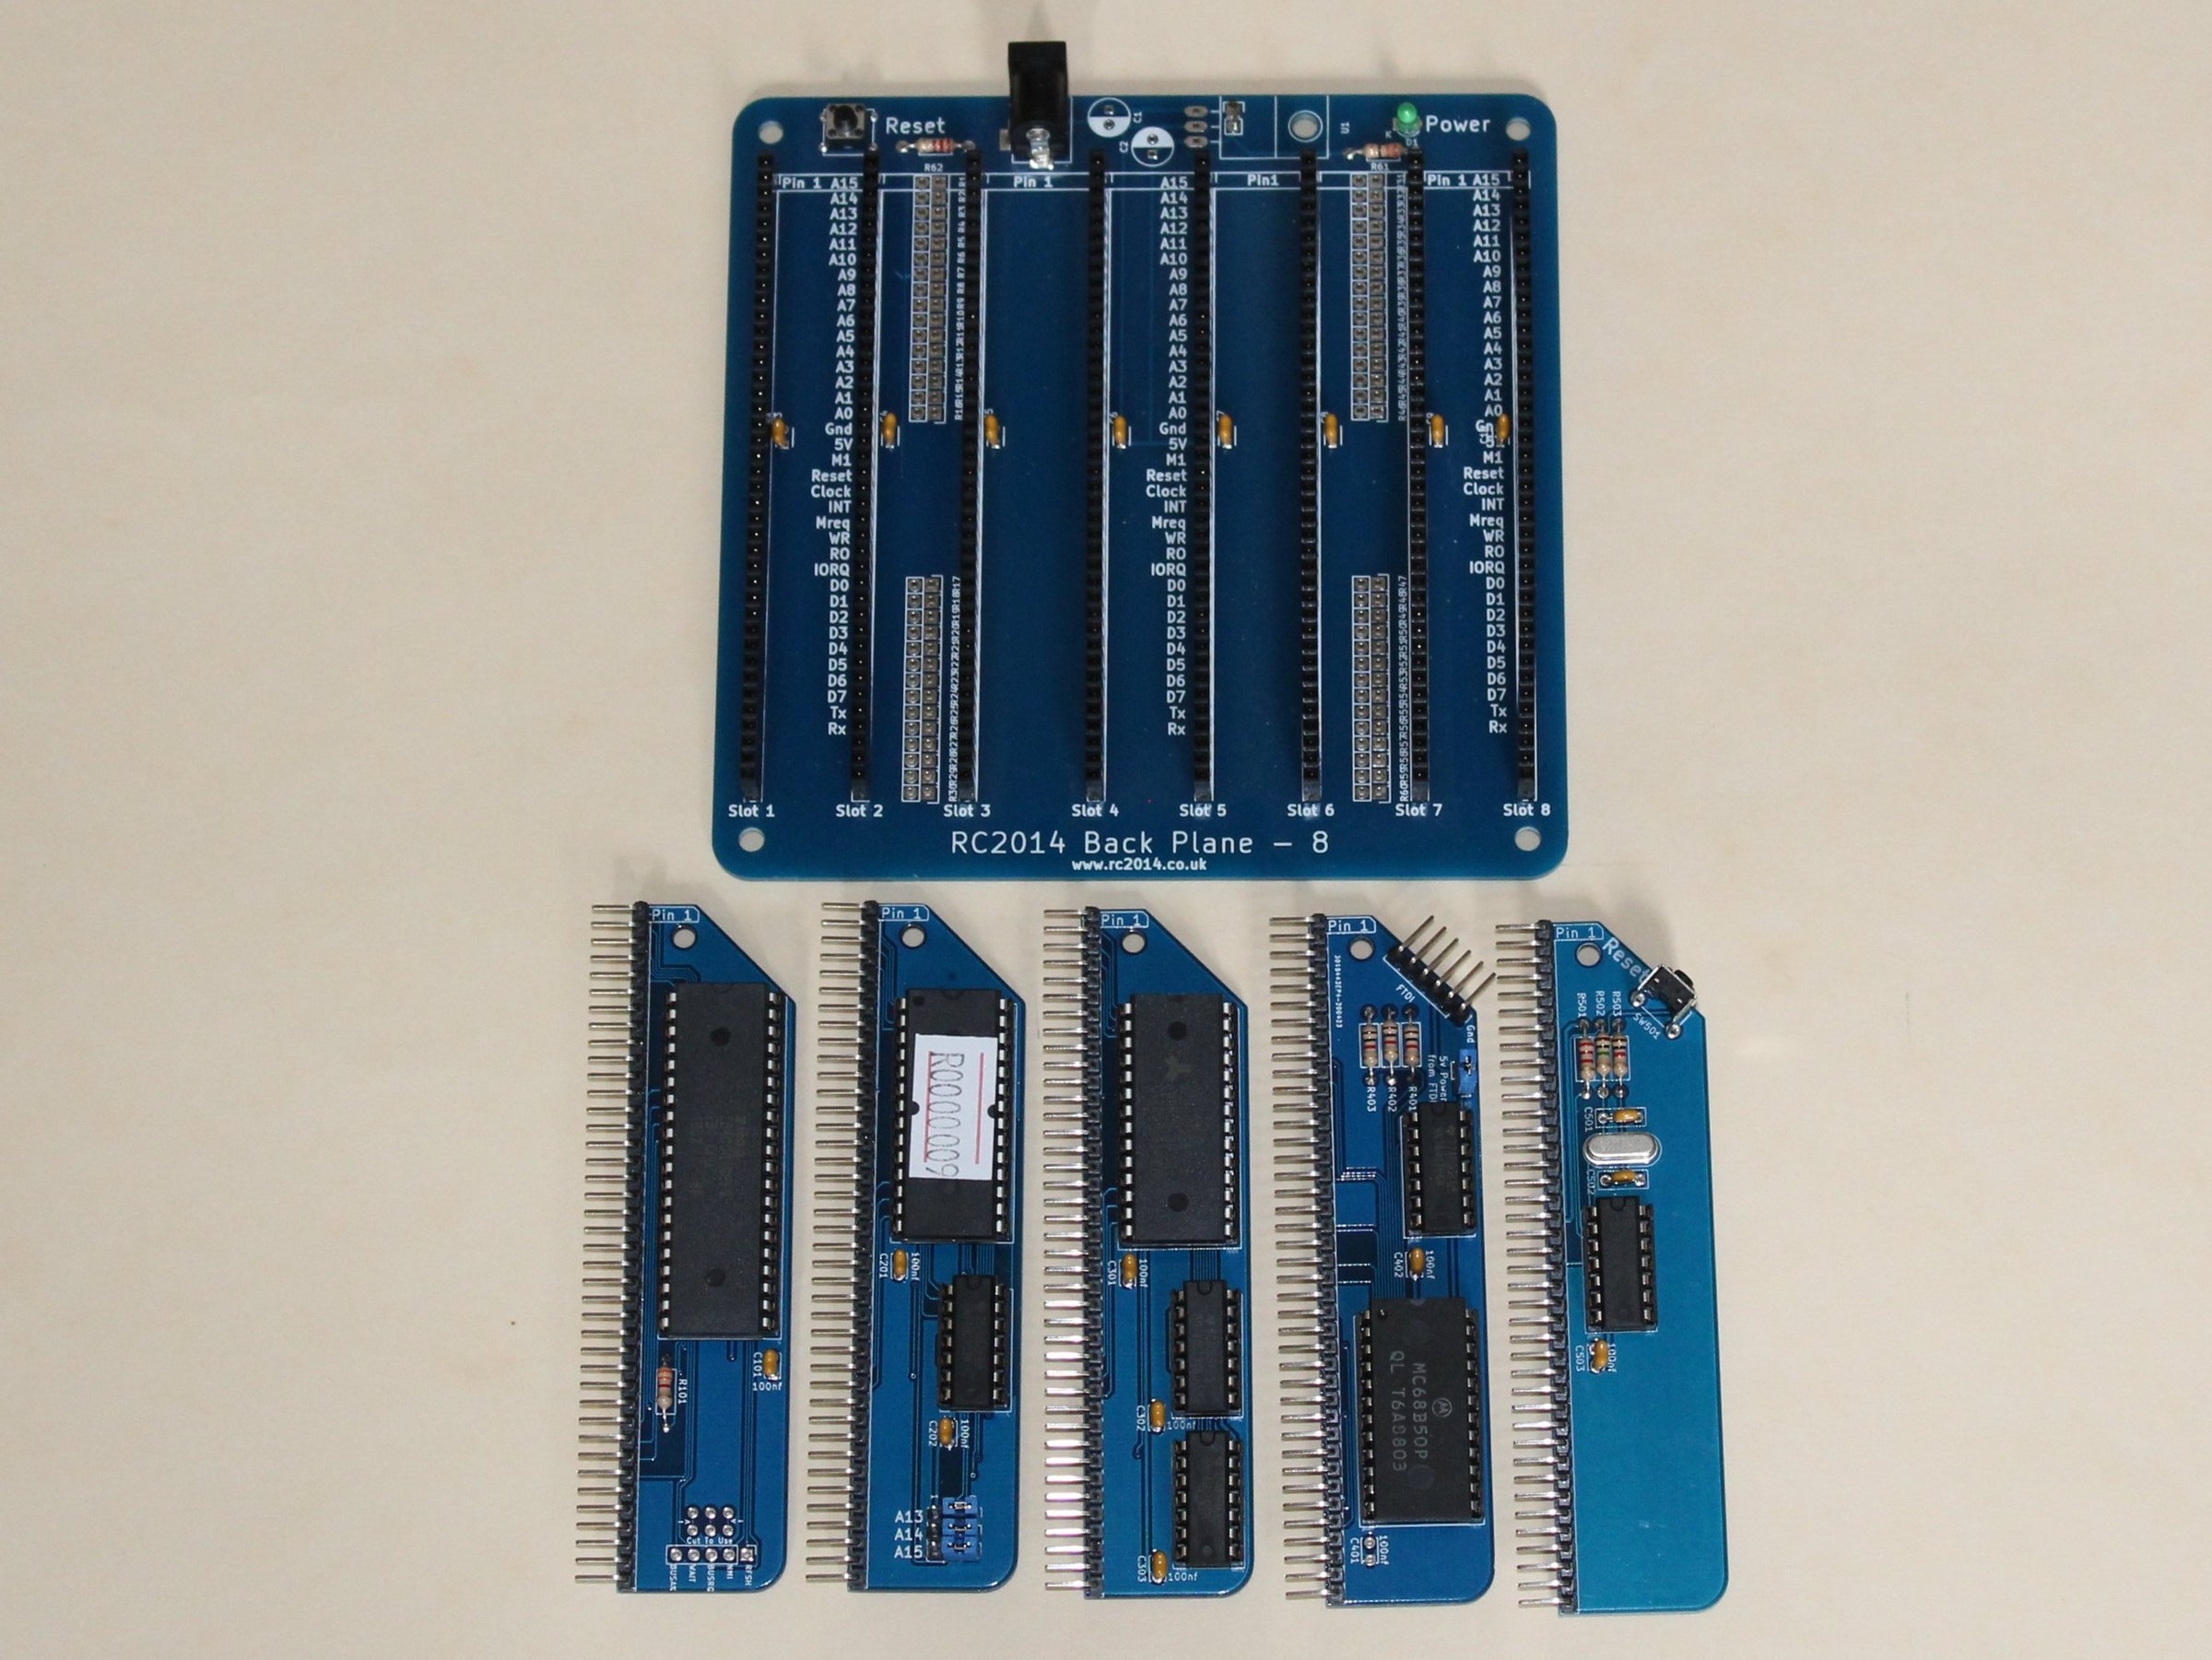
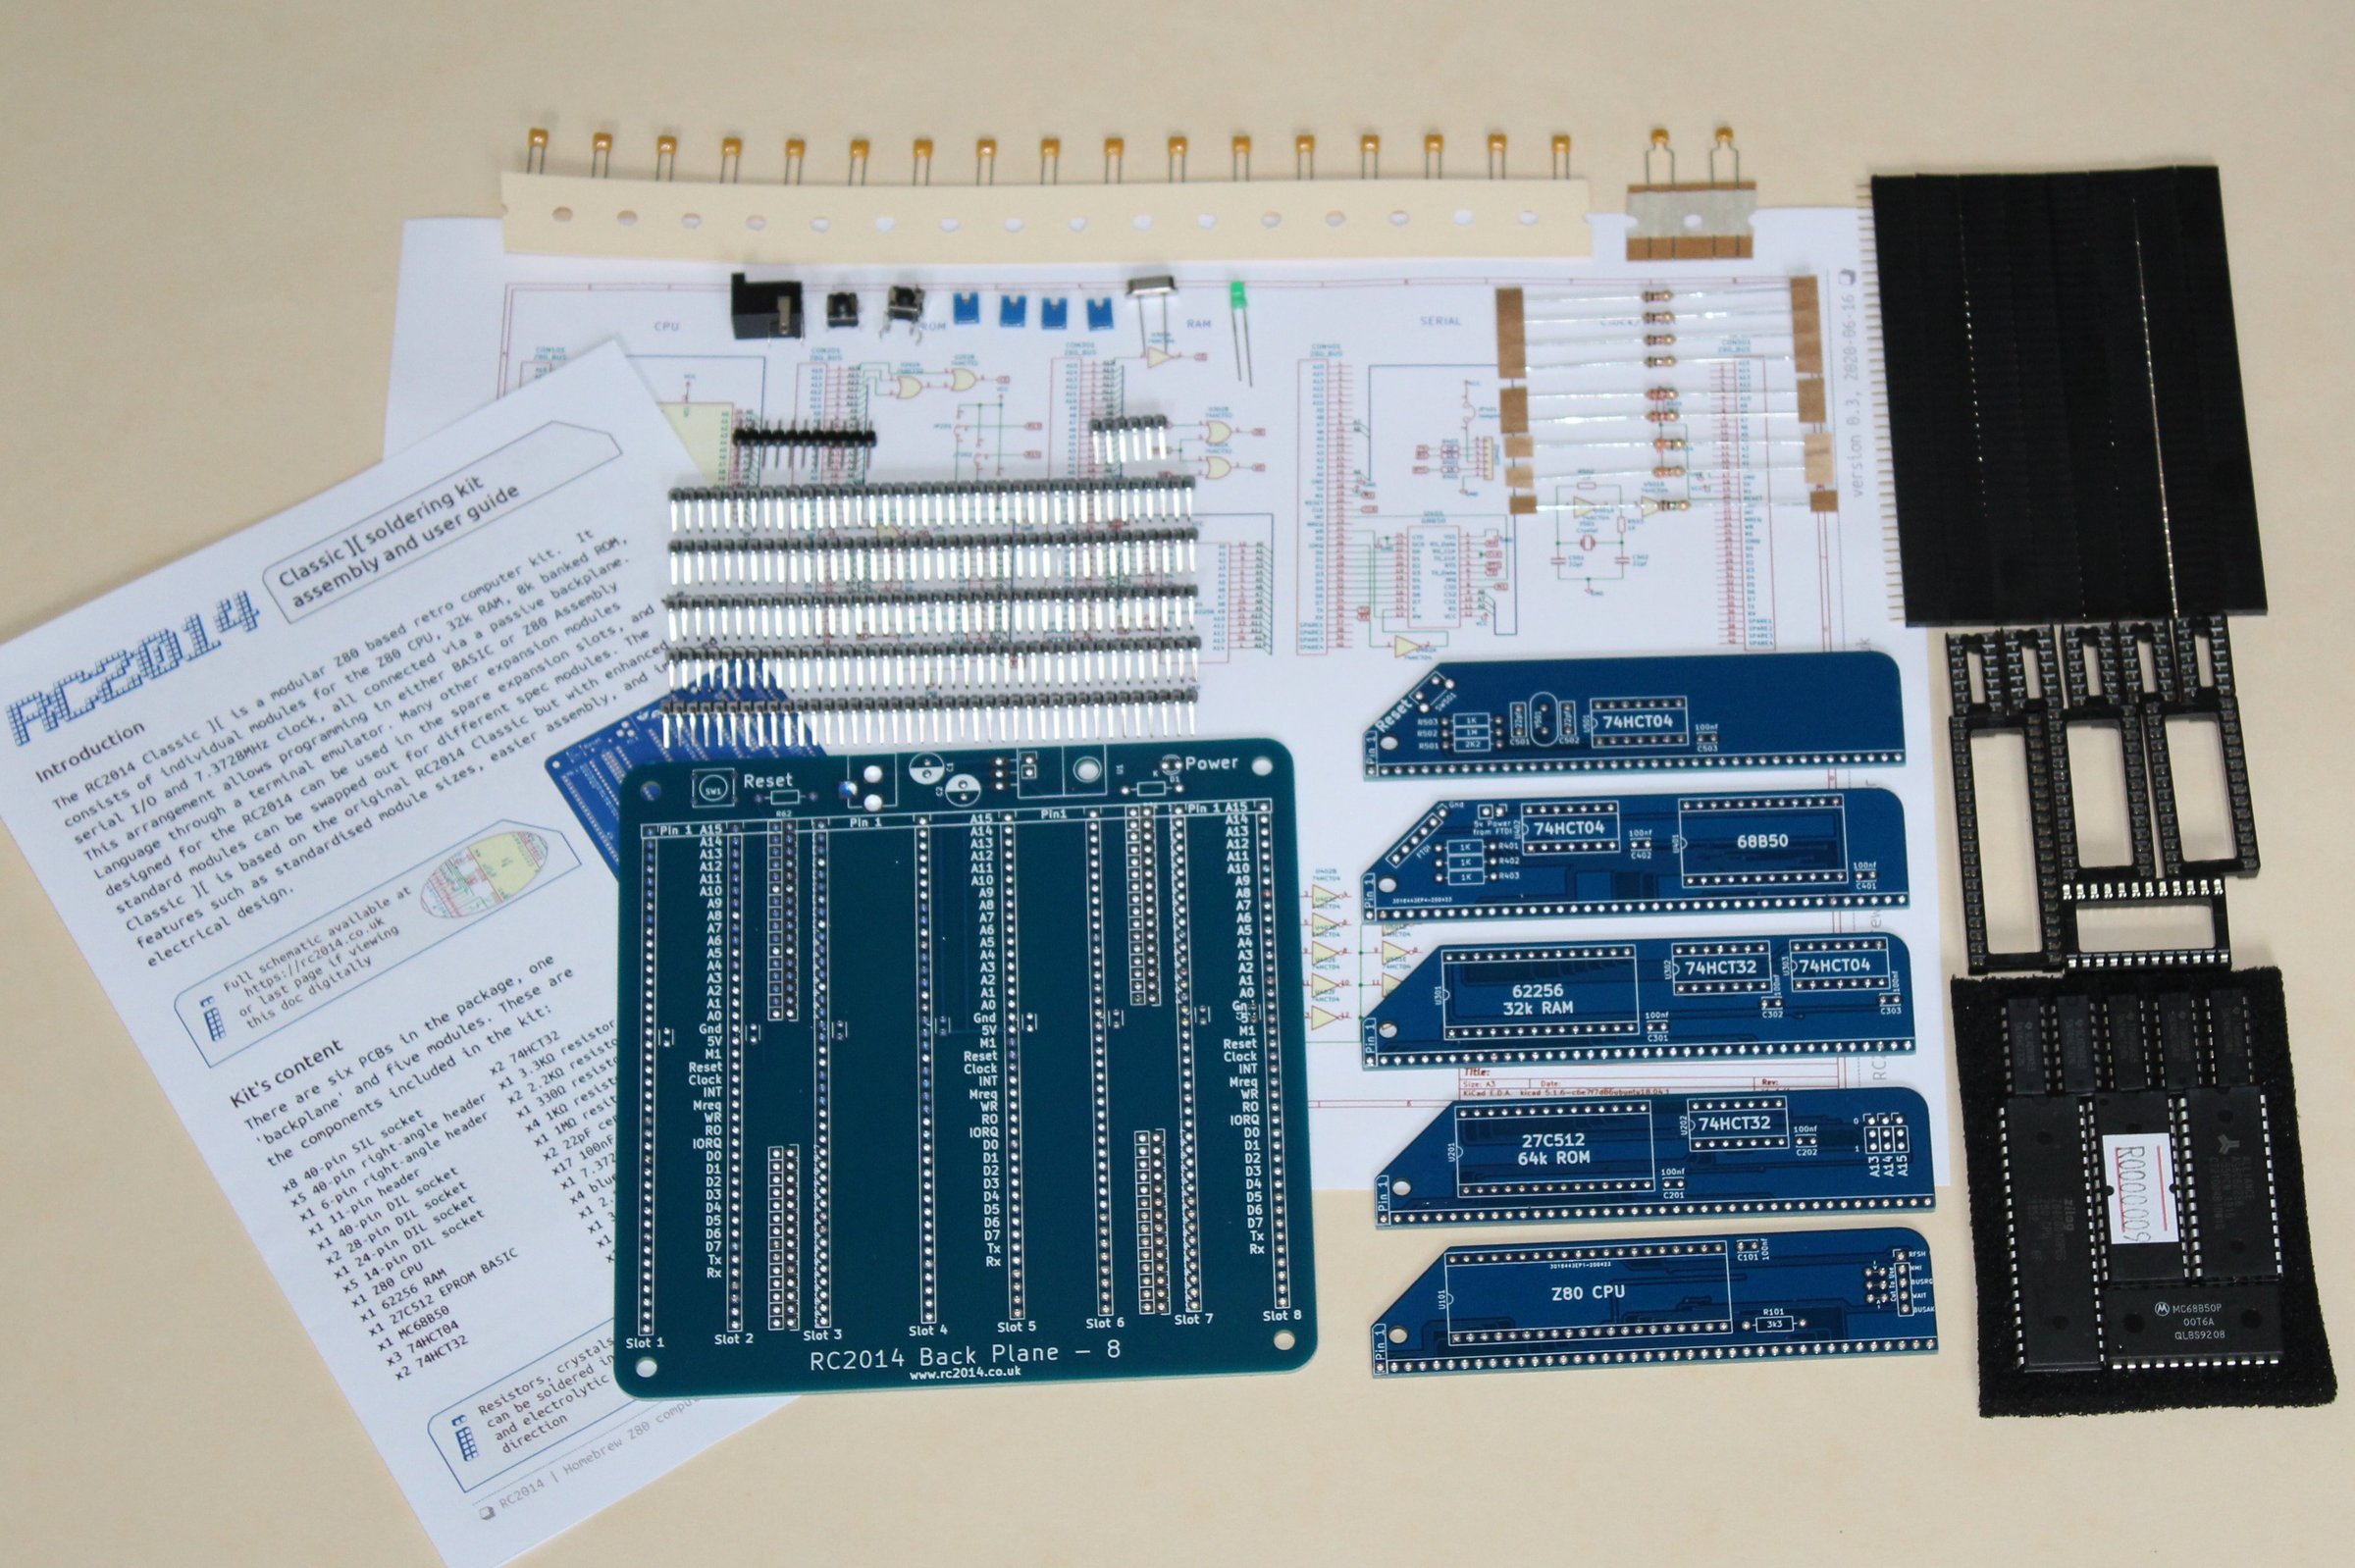
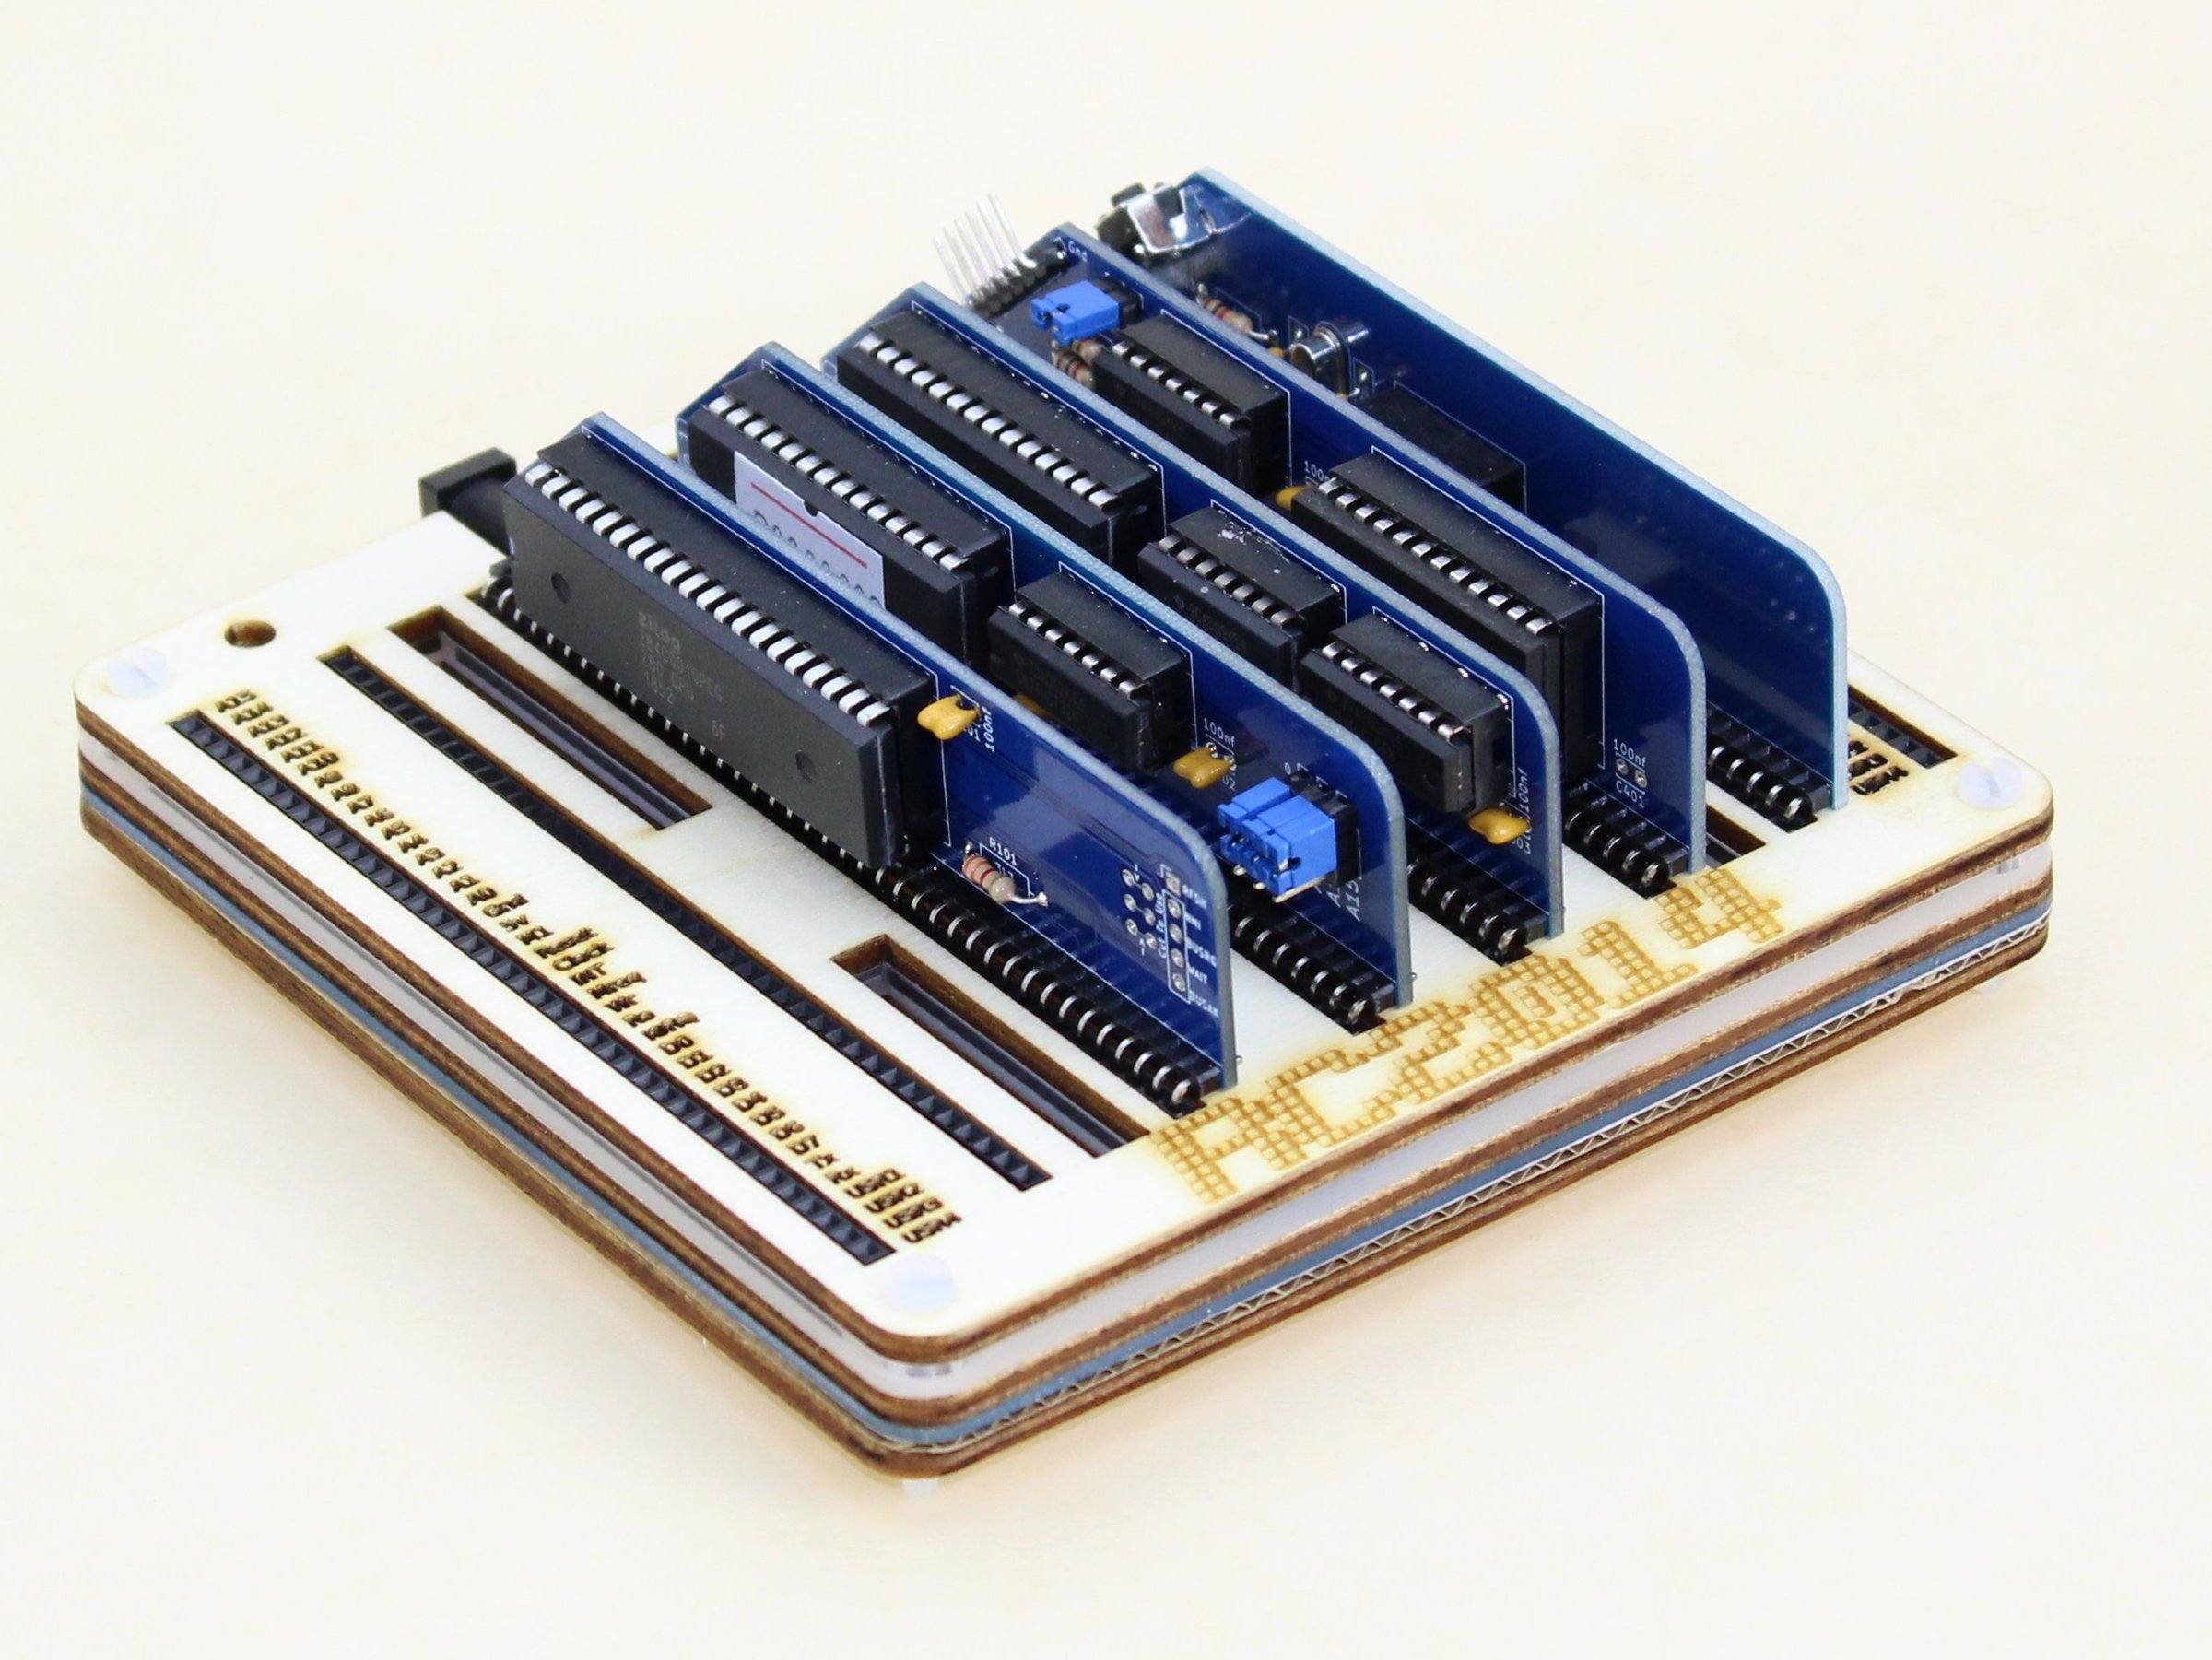
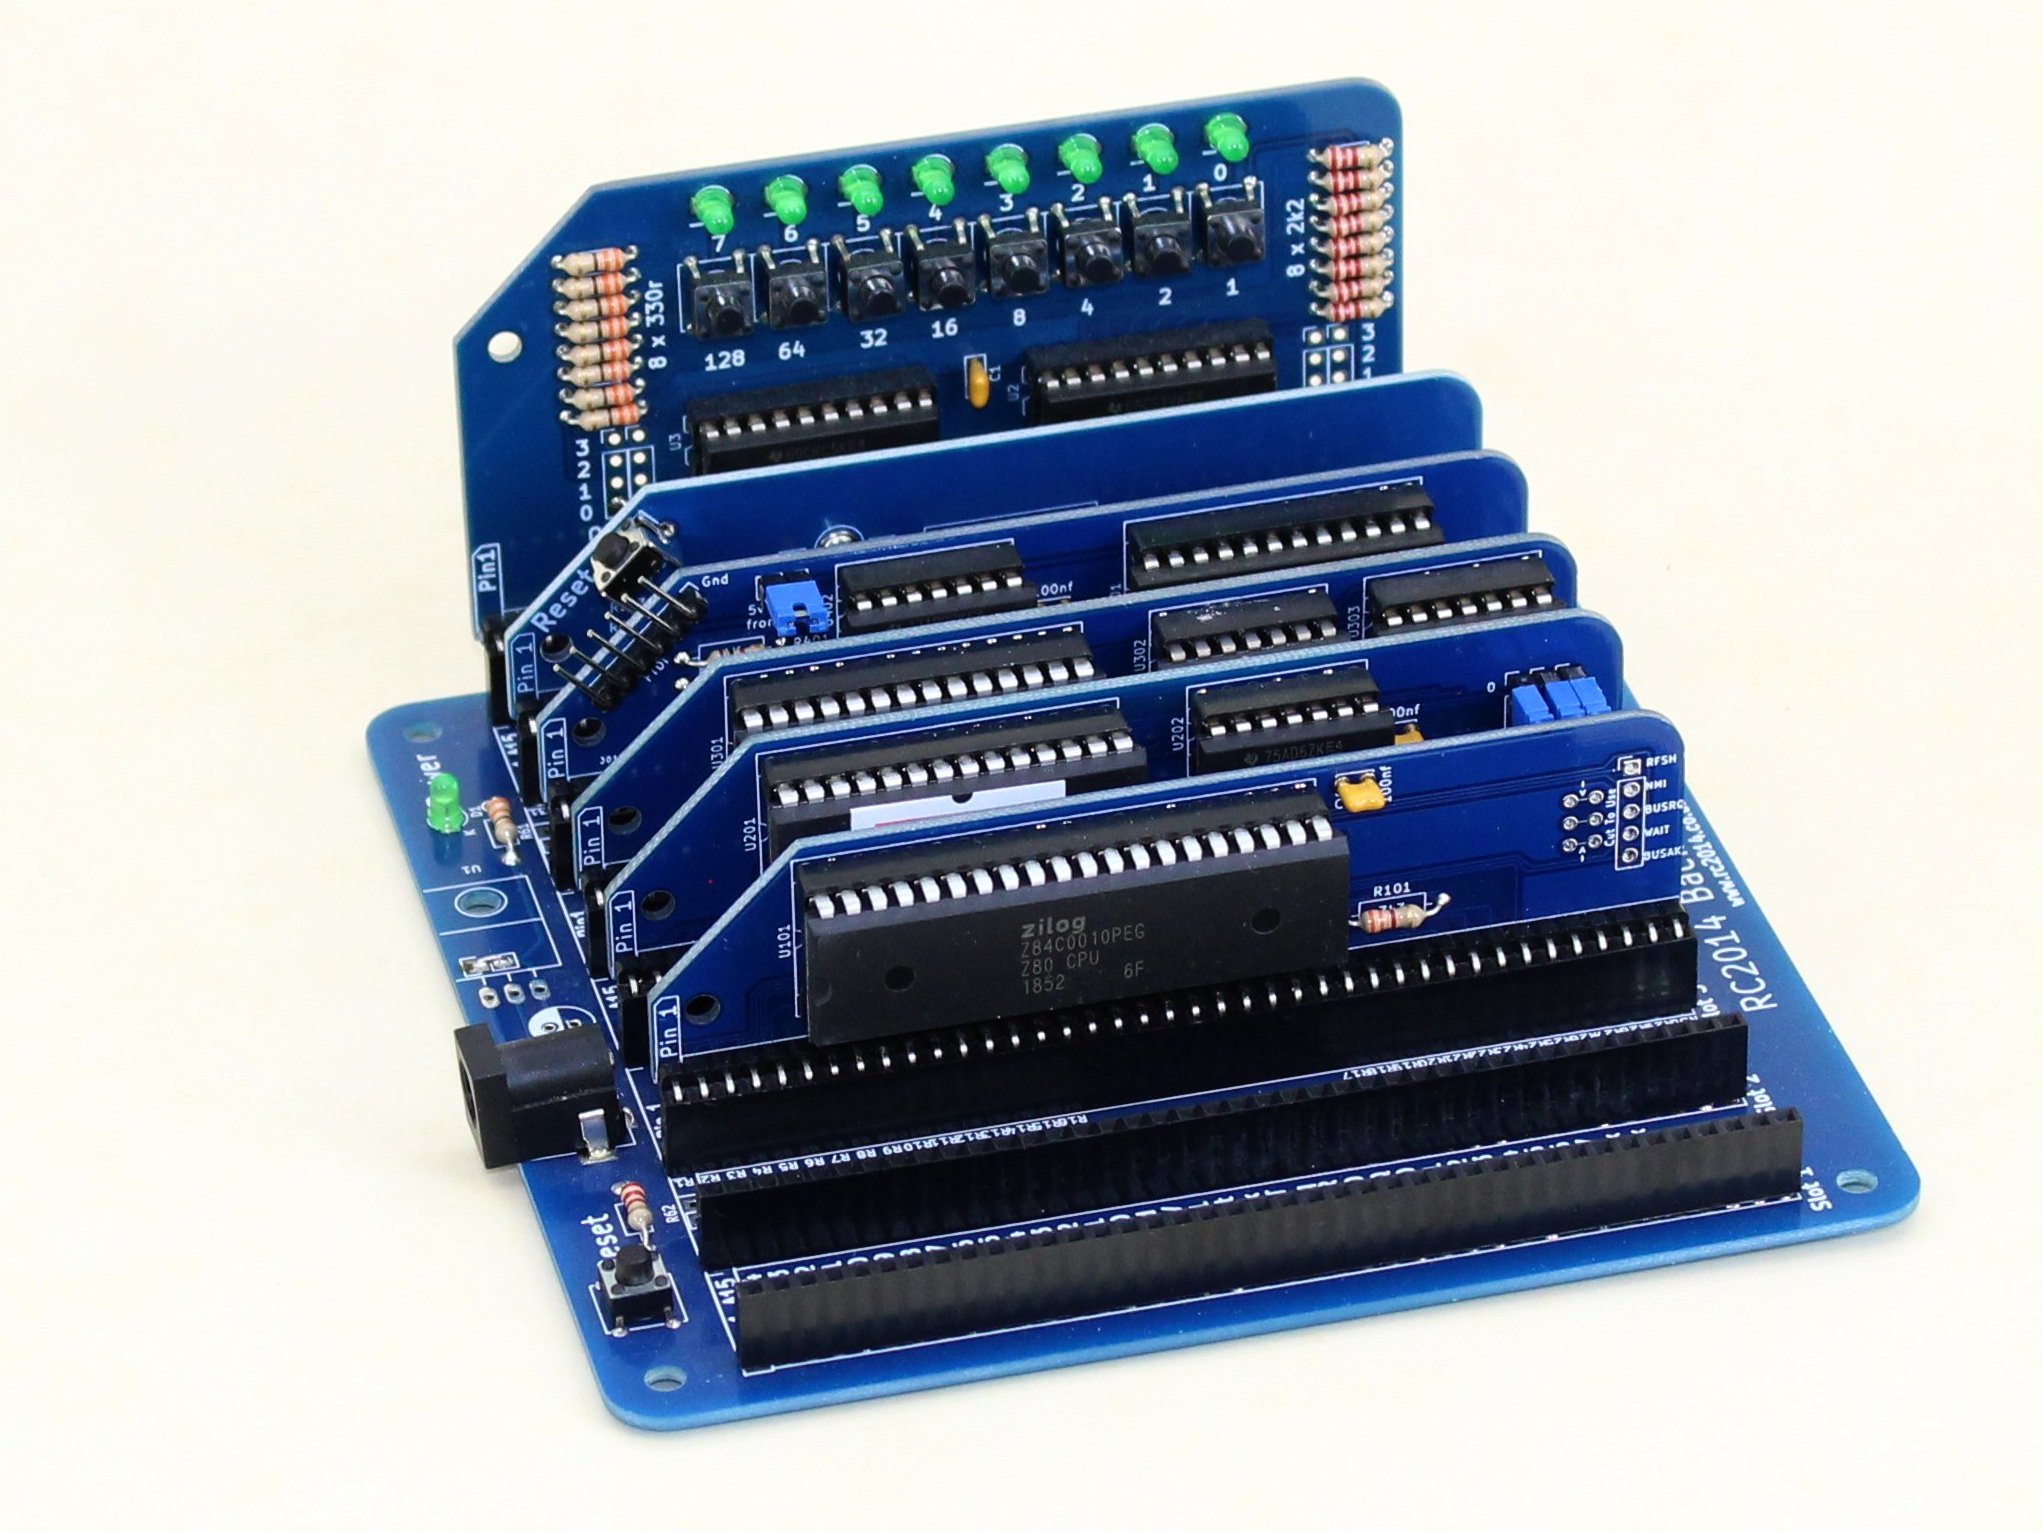
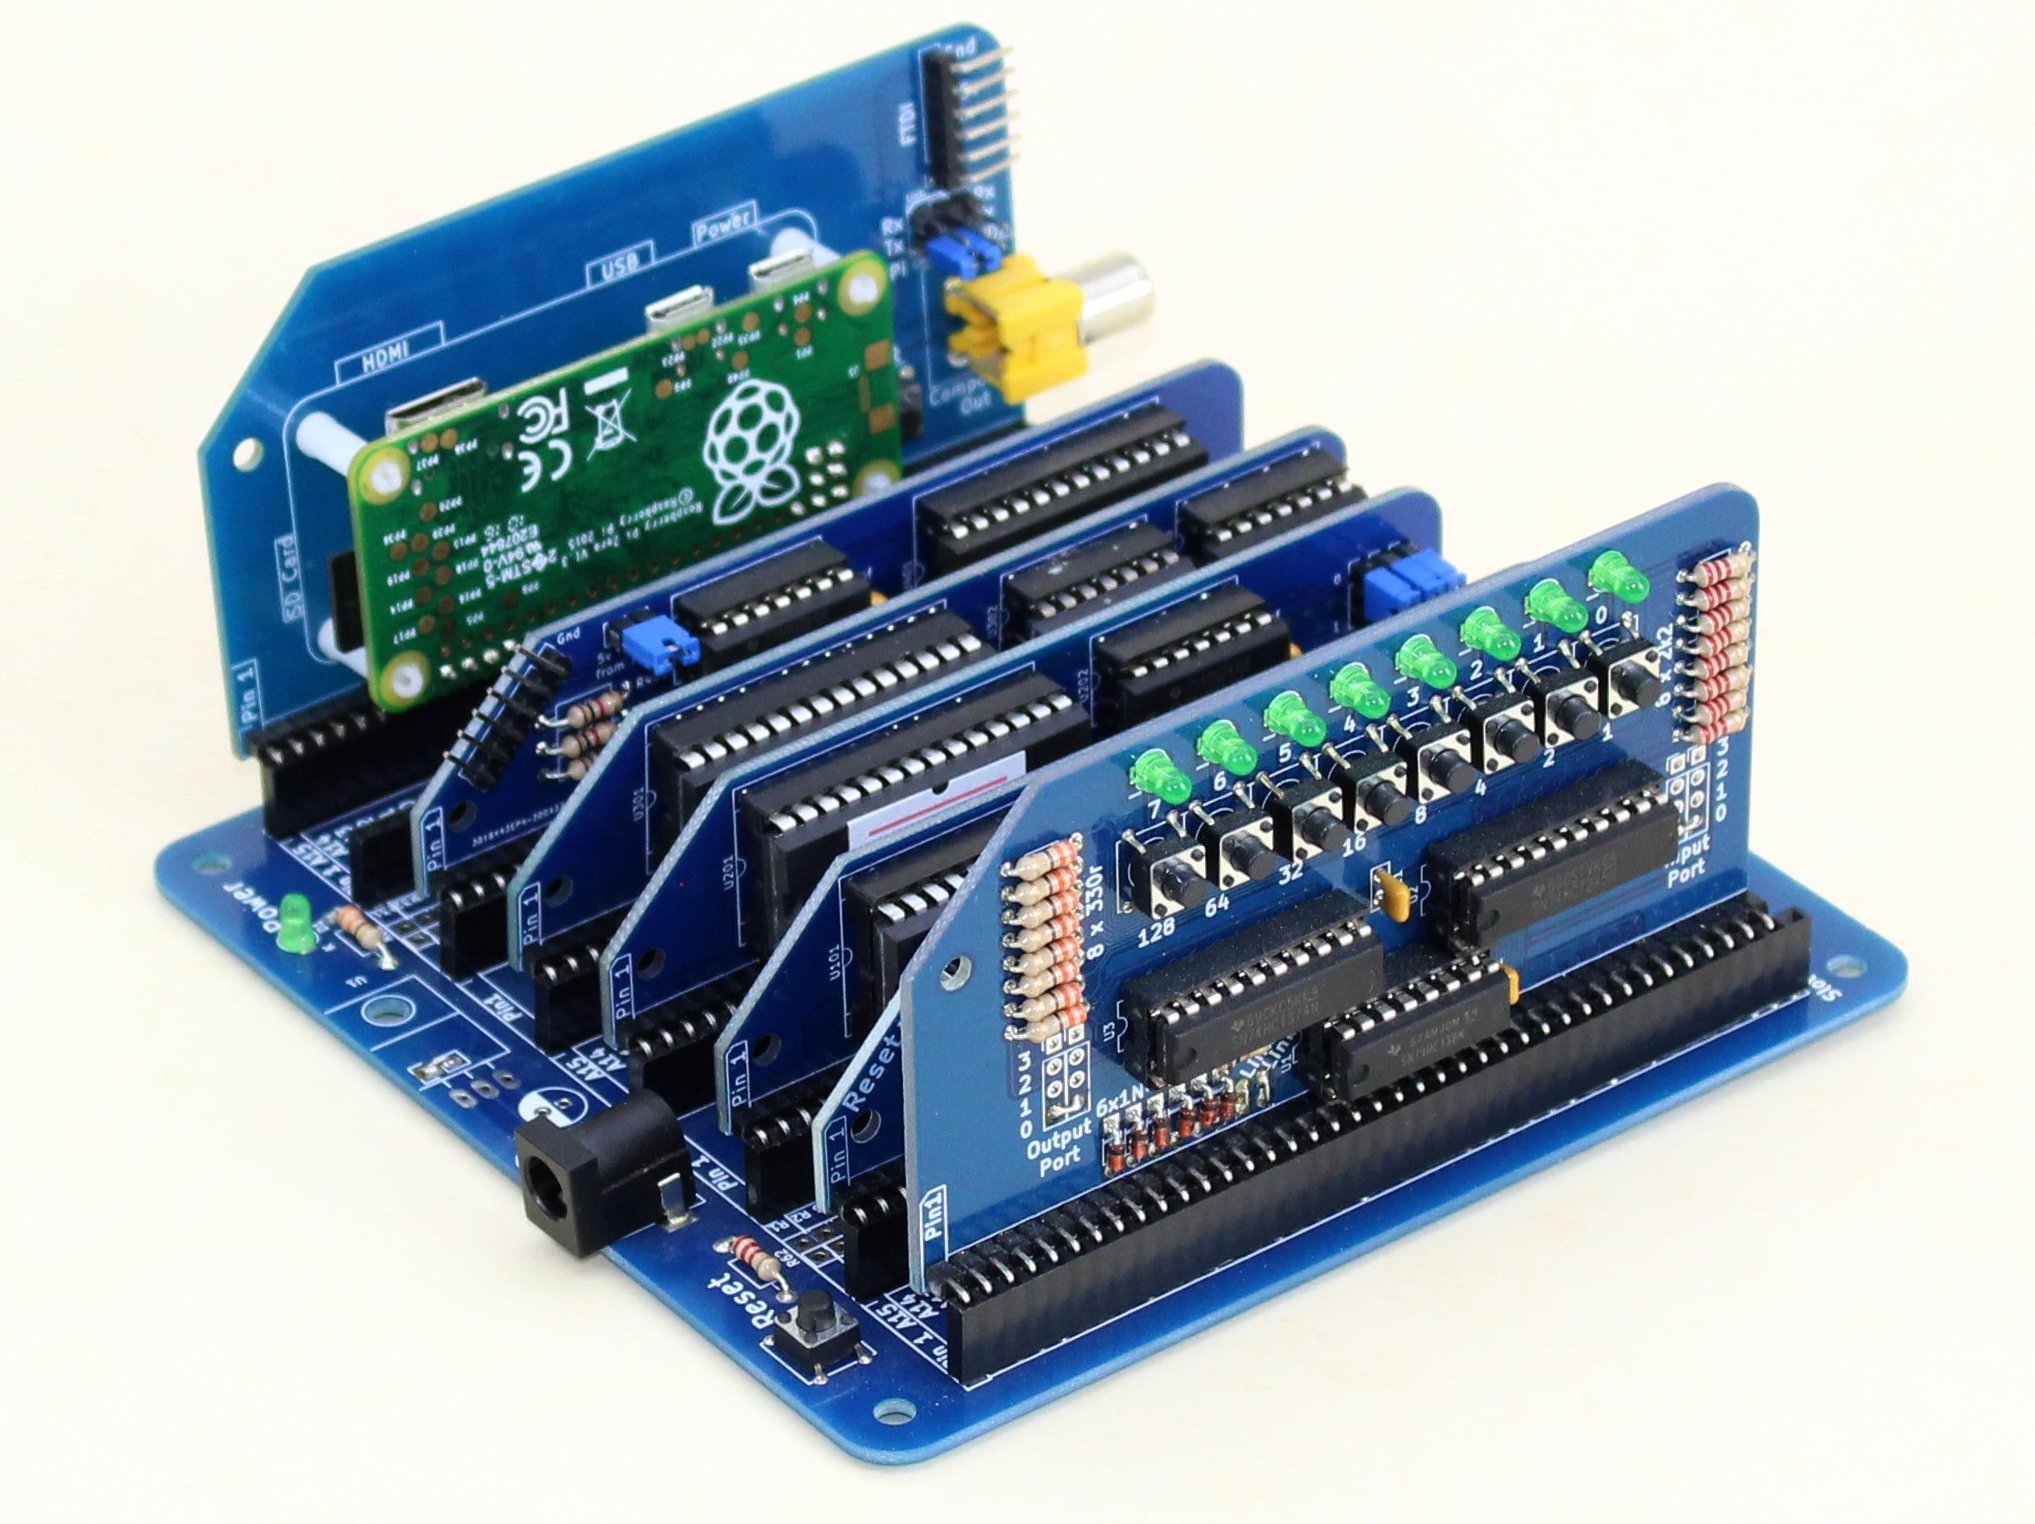
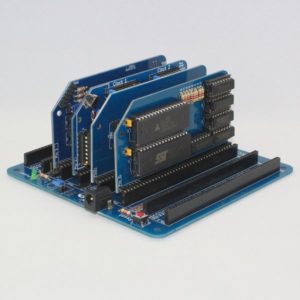
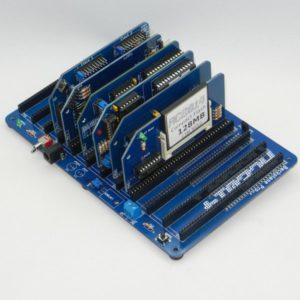
- 8 slot backplane with 3 free slots
- RC2014 Standard Bus for use with many RC2014 compatible modules
- Power from FTDI cable or 5v barrel jack
- Low profile (half height) module form factor
Classic vs Classic ][
The original RC2014 Classic was designed in 2014, and having sold over 1000 units, has been the most popular kit in the RC2014 lineup to date. Whilst it is a great kit, there are opportunities for improvement. The RC2014 Classic II Z80 computer kit uses a consistent module form factor for all modules, all oriented the same way around. The PCB layout is electrically and visually better, with a generous smattering of decoupling capacitors. It comes with a better assembly guide, and easier to follow schematics too!
Expansion
The core modules take up 5 out of the 8 slots on the backplane. This gives you 3 slots of expandability for things like a Digital I/O Module, or a Pi Zero Serial Terminal. If you want to take things to the next level, consider the CP/M Upgrade Kit to boost memory to 64k and add compact flash storage.
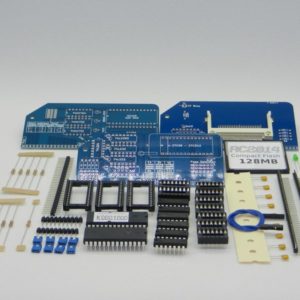
Kit Options
- PCB Only (No backplane) – Just the CPU, ROM, RAM, Serial and Clock/Reset PCB
- PCB Only (Inc backplane) – Full set of all 6 PCBs
- Full Kit – All PCBs, headers, sockets, passive components, ICs and printed assembly guide


Jeff Ratliff (verified owner) –
This kit is perfect for me. I’ve always wanted a simple Z80 machine since I saw the ZX81 kit in electronics magazines when I was a kid. Something I could build and brush up on my machine language with. The Mini and Micro would have been quicker to build, but with the Classic II I have a system I can completely understand.
The modular design is the main reason I picked the RC2014. It’s easy to change and upgrade, but having everything broken up over multiple boards makes assembly and understanding the design a lot simpler.
The Pro and Zed are great value, but I wanted to start with a bare minimum system and build it up to run CP/M eventually. I think I’ll do that then maybe build a Pro.
This specific kit was nicely packaged. Everything comes in separate envelopes. The kit has changed since the rc2014.co.uk assembly guide was written, but the printed guide that comes with the kit is up to date. The current backplane does NOT require bridging to use all 8 slots. The board is bridged, and traces can be cut if you want to isolate slots. This seems like a better solution for most people. I also got a 39SF010 instead of the 27C512, but I’m not going to complain.
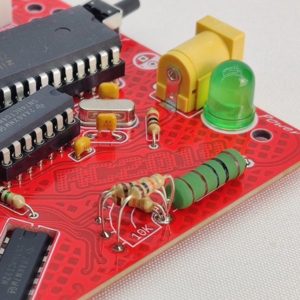
I’ve done a lot of kits, but I found this one very easy to build because there’s plenty of room on the boards, and everything is high quality. Even a beginner should be able to put it together if they are careful and take time. I built a board a night over several days. The right angle headers and sockets don’t like a lot of heat so be careful. I was able to get the ones I messed up back into shape though.
The whole experience has been better than expected. I’d definitely recommend trying one of these kits.
James Harland (verified owner) –
A great kit for beginner solderers! I started soldering a month before I completed this kit. In that month I practised on a Tetris game, a couple of alarm clocks, a radio and a doorbell kit, and then I felt ready to tackle the RC 2014. The kit is nicely arranged and the PCBs and components are good quality, so it’s easy to solder. The hardest thing I found were the corner edge connectors – getting them straight was the biggest challenge, so maybe I should have practiced with that a bit more before I started.
I followed the printed instructions, and the excellent YouTube series of Custom PC Hardware, and was careful to look for dry solders, and solder bridges (spotted and dealt with several of those along the way). I did need solder wick, and a solder pump for the times I accidentally dripped solder onto holes I still needed to use. It took me 7 hours to solder, one evening and one morning, and I am very pleased to say that it booted up and connected over the serial connection first time, and is still going strong after a few days of experimentation.
One minor gripe is that to switch between BASIC and the Assembly Monitor, you need to remove tight and fiddly jumpers, which in my case means I always have to pop the ROM board off and then reseat it to change from one to the other. The BASIC is a bit basic too (no INKEY$ as far as I can tell), but this is all part of the fun of working with such a simple machine, really. The Monitor is excellent, with a built in assembler.
I do think it’s worth looking carefully at the other kits though to see exactly what you want and where you want to go. I am happy to have this one as it does allow me to add a few more expansions, though upgrading to PC/M will require me to reuse some chips.
I’d like to echo the other reviewer, that the printed instructions are correct, so you should follow them rather than the pdf ones.
I also want to say that the after sales support is excellent – Spencer gave detailed answers to all my questions, and steered me on the right path to getting things up and running quickly.